| Llangollen Canal |
 |

Click the photo to the sub menu - Cliquer la photo pour le sous-menu |
Berwyn |

Click the photo to the sub menu - Cliquer la photo pour le sous-menu |
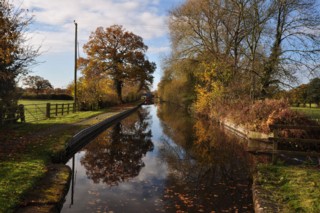
Pentre-Felin |

Click the photo to the sub menu - Cliquer la photo pour le sous-menu |
Llangollen |

Click the photo to the sub menu - Cliquer la photo pour le sous-menu |
Wern Isaf |

Click the photo to the sub menu - Cliquer la photo pour le sous-menu |
Nyth-y-dryw |

Click the photo to the sub menu - Cliquer la photo pour le sous-menu |
Plas Ifan |

Click the photo to the sub menu - Cliquer la photo pour le sous-menu |
Bryn Howel |

Click the photo to the sub menu - Cliquer la photo pour le sous-menu |
Plâs-Isaf |

Click the photo to the sub menu - Cliquer la photo pour le sous-menu |
Plas-yn-pentre
|

Click the photo to the sub menu - Cliquer la photo pour le sous-menu |
Plas-yn-pentre
|

Click the photo to the sub menu - Cliquer la photo pour le sous-menu |
Rhos-y-coed |

Click the photo to the sub menu - Cliquer la photo pour le sous-menu |
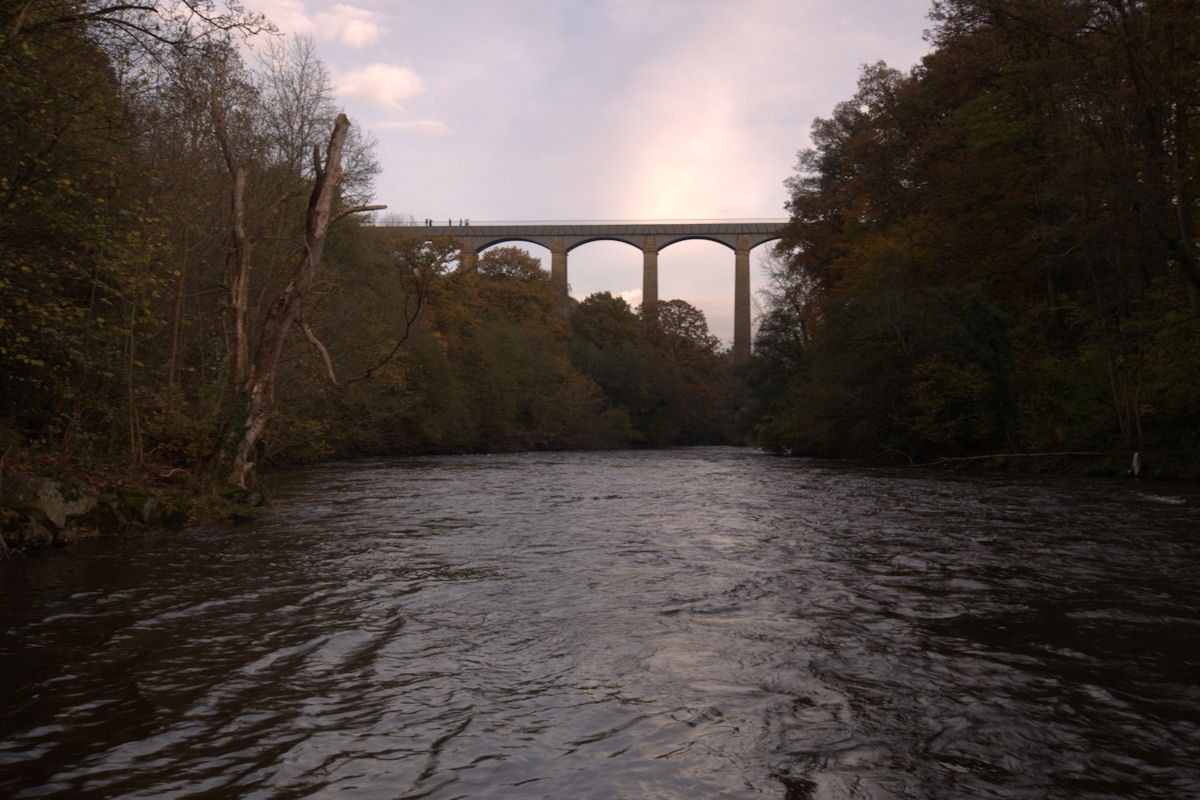
Trevor |

Click the photo to the sub menu - Cliquer la photo pour le sous-menu |
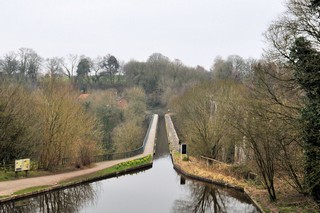
Fron Aqueduct |

Click the photo to the sub menu - Cliquer la photo pour le sous-menu |
Fron |

Click the photo to the sub menu - Cliquer la photo pour le sous-menu |
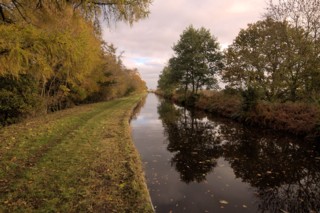
Glencoed |
Click the photo to the sub menu - Cliquer la photo pour le sous-menu |
Pentre |

Click the photo to the sub menu - Cliquer la photo pour le sous-menu |
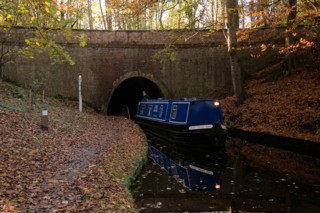
Chirk |
Click the photo to the sub menu - Cliquer la photo pour le sous-menu |
Chirk Bank |

Click the photo to the sub menu - Cliquer la photo pour le sous-menu |
Gledrid |

Click the photo to the sub menu - Cliquer la photo pour le sous-menu |
Rhoswiel |

Click the photo to the sub menu - Cliquer la photo pour le sous-menu |
Henlle Hall |

Click the photo to the sub menu - Cliquer la photo pour le sous-menu |
Sint-Martin's Moor |

Click the photo to the sub menu - Cliquer la photo pour le sous-menu |
Rhosygadfa |

Click the photo to the sub menu - Cliquer la photo pour le sous-menu |
New Marton Locks |

Click the photo to the sub menu - Cliquer la photo pour le sous-menu |
Hindford |

Click the photo to the sub menu - Cliquer la photo pour le sous-menu |
Lower Ridge
|

Click the photo to the sub menu - Cliquer la photo pour le sous-menu |
Lower Ridge
|

Click the photo to the sub menu - Cliquer la photo pour le sous-menu |
Welsh Frankton |

Click the photo to the sub menu - Cliquer la photo pour le sous-menu |
Lower Frankton
|

Click the photo to the sub menu - Cliquer la photo pour le sous-menu |
Frankton Junction |

Click the photo to the sub menu - Cliquer la photo pour le sous-menu |
Lower Frankton
|

Click the photo to the sub menu - Cliquer la photo pour le sous-menu |
Winston |

Click the photo to the sub menu - Cliquer la photo pour le sous-menu |
Ontston |

Click the photo to the sub menu - Cliquer la photo pour le sous-menu |
Newnes |

Click the photo to the sub menu - Cliquer la photo pour le sous-menu |
Ellesmere |

Click the photo to the sub menu - Cliquer la photo pour le sous-menu |
Castle Field |

Click the photo to the sub menu - Cliquer la photo pour le sous-menu |
Blake Mere |

Click the photo to the sub menu - Cliquer la photo pour le sous-menu |
Yell Wood |

Click the photo to the sub menu - Cliquer la photo pour le sous-menu |
Lyneal |
Click the photo to the sub menu - Cliquer la photo pour le sous-menu |
Balmer Heath |

Click the photo to the sub menu - Cliquer la photo pour le sous-menu |
Bettisfield |

Click the photo to the sub menu - Cliquer la photo pour le sous-menu |
Bettisfield Moss |

Click the photo to the sub menu - Cliquer la photo pour le sous-menu |
Whixall Moss |

Click the photo to the sub menu - Cliquer la photo pour le sous-menu |
Platt Lane |

Click the photo to the sub menu - Cliquer la photo pour le sous-menu |
Brickwalls |

Click the photo to the sub menu - Cliquer la photo pour le sous-menu |
Blackoe |

Click the photo to the sub menu - Cliquer la photo pour le sous-menu |
Fenn's Bank |

Click the photo to the sub menu - Cliquer la photo pour le sous-menu |
Belton |

Click the photo to the sub menu - Cliquer la photo pour le sous-menu |
Hadley |

Click the photo to the sub menu - Cliquer la photo pour le sous-menu |
Whitchurch Road Bridge |

Click the photo to the sub menu - Cliquer la photo pour le sous-menu |
Whitchurch Junction |

Click the photo to the sub menu - Cliquer la photo pour le sous-menu |
Stoneleigh |

Click the photo to the sub menu - Cliquer la photo pour le sous-menu |
Grindley Brook
|

Click the photo to the sub menu - Cliquer la photo pour le sous-menu |
Grindley Brook
|

Click the photo to the sub menu - Cliquer la photo pour le sous-menu |
Grindley Brook
|

Click the photo to the sub menu - Cliquer la photo pour le sous-menu |
Land of Canaan |

Click the photo to the sub menu - Cliquer la photo pour le sous-menu |
Bradeley Green |

Click the photo to the sub menu - Cliquer la photo pour le sous-menu |
Quoisley |

Click the photo to the sub menu - Cliquer la photo pour le sous-menu |
Marbury |

Click the photo to the sub menu - Cliquer la photo pour le sous-menu |
Wrenbury Frith |

Click the photo to the sub menu - Cliquer la photo pour le sous-menu |
Wrenbury |

Click the photo to the sub menu - Cliquer la photo pour le sous-menu |
Wrenbury-cum-Frith |

Click the photo to the sub menu - Cliquer la photo pour le sous-menu |
Wrenbury Hall |

Click the photo to the sub menu - Cliquer la photo pour le sous-menu |
Wrenbury Heath |

Click the photo to the sub menu - Cliquer la photo pour le sous-menu |
Baddiley Locks
|

Click the photo to the sub menu - Cliquer la photo pour le sous-menu |
Baddiley Locks
|

Click the photo to the sub menu - Cliquer la photo pour le sous-menu |
Ravensmoor |

Click the photo to the sub menu - Cliquer la photo pour le sous-menu |
Stoneley Green |
Click the photo to the sub menu - Cliquer la photo pour le sous-menu |
Springelane Hall |

Click the photo to the sub menu - Cliquer la photo pour le sous-menu |
Swanley |

Click the photo to the sub menu - Cliquer la photo pour le sous-menu |
Burland |

Click the photo to the sub menu - Cliquer la photo pour le sous-menu |
Hurleston |

Click the photo to the sub menu - Cliquer la photo pour le sous-menu |
Hurleston Locks
|

Click the photo to the sub menu - Cliquer la photo pour le sous-menu |
Hurleston
|

Click the photo to the sub menu - Cliquer la photo pour le sous-menu |
Hurleston
|
|
Visitez/Bezoek/Visit
Click on the image - cliquer sur l'image |
|
Walking the British Waterways |
|
|